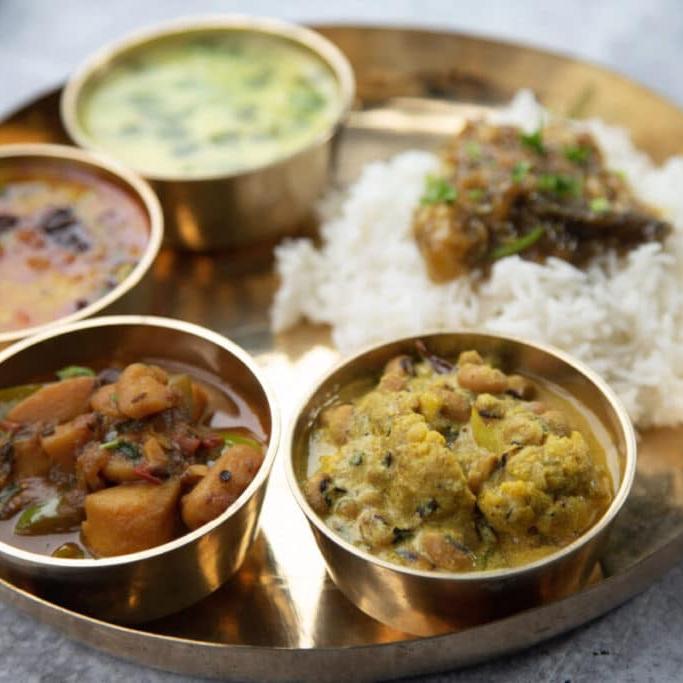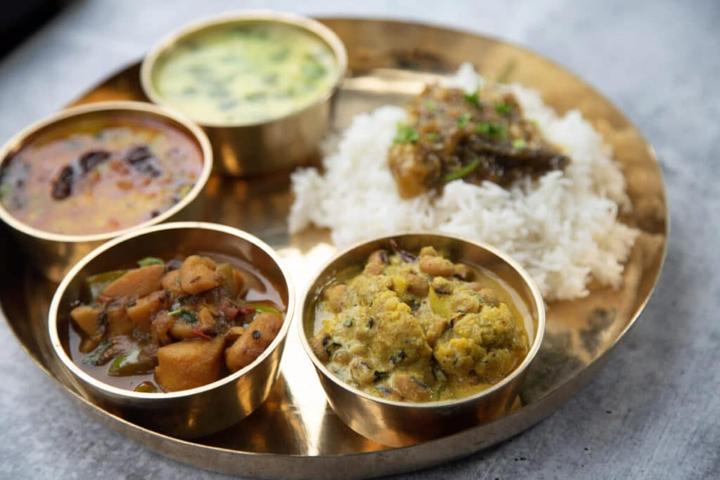
Rongi gobhi ka dum is a curry in Himachali cuisine. Rongi/Lobia/Black-eyed peas, Gobhi/Cauliflower florets are cooked in yogurt sauce with a variety of spices that give this dish a unique aroma and flavor. It is served as one of the side dishes with hot white steamed rice in Mandayali Dham, community midday (six to seven-course) meal.
There is no use of onions, garlic, ginger, and tomatoes in the preparation. This is slow-cooked on low heat to ensure the yogurt does not curdle and break down. This preparation can be enjoyed as a side dish or as a main dish.
What I love about Rongi Gobhi ka Dum
Rongi gobhi ka dum is one of my favorite weekday go-to curries when I am short of time because rongi does not require presoaking and instead of preparing two different dishes, I just prepare one-dish and it serves as a meal. This is a simple and delicious recipe to make at home and this style of preparation is also easy to digest and loaded with health benefits.
I also cook this as a side dish when I make a more elaborate Himachali meal. The aroma and warm flavors of this dish take me back to my hometown in Himachal Pradesh, India.
How to make Rongi Gobhi ka Dum
This recipe is very simple but it does involve several steps however everything goes on simultaneously and the whole recipe comes together in 45 mins. Preheat the oven at 400°F (205°C). Pressure cook the rongi. While they are getting cooked, prepare the cauliflower, and place it in the oven. Grind the spices and prepare the yogurt mixture. Next, make the yogurt sauce, by the time rongi will be ready to be added and simultaneously cauliflower will get ready.

Cook Rongi/Lobia/Black-eyed peas
Rongi/Lobia/black-eyed peas are a great source of protein and fiber. I do not presoak rongi because they cook easily, unlike other beans.
Wash rongi and pressure cook with 1 tsp of salt and 3-4 dried Kashmiri red chilies for 15 minutes using instant pot/pressure cooker or until tender but still holds the shape and can be crushed easily. Strain the rongi and preserve 1/2 cup of the liquid.
NOTE: Cooking times vary and depend on the source of the bean, hardness of the cooking water, and many other factors.
Roast the Cauliflower
Traditionally cauliflower is deep-fried so that cauliflower retains its shapes and not become mushy in the yogurt base. Roasting them in the oven is equally tasty, serves the same purpose, and is a great alternative for guilt-free eating.
In a large bowl, combine the vegetable/canola oil, roasted cumin and red chili powder, turmeric powder and salt. Add the cauliflower florets and using your hands rub the marinade into the florets. Make sure all the florets are coated well with the marinade.

Transfer to a baking sheet and make sure not to overcrowd the pan as the florets will produce steam and not turn golden brown. Bake at 400°F (205°C) for 30-40 mins or until golden and tender but not mushy.

Prepare the Yogurt
I use full-fat yogurt for this preparation. In a bowl whisk together yogurt, roasted cumin and red chili powder, turmeric powder, and salt and set aside.

Grind the spices
Using a spice grinder, coarsely grind the whole black pepper, fenugreek seeds, and fennel seeds and set aside.
Bloom the whole spices
In a wok (Kadai) on low heat add ghee. Once the ghee has melted add the bay leaves, cinnamon stick, cloves, black and green cardamom. Sauté till bay leaves changes color and the spices become fragrant. This will take about 2 minutes.

NOTE: It is important to start with adding the whole spices first as they release their aroma in the oil and provides depth in flavors.
Add the ground spices
Next, add the ground fennel seeds, fenugreek seeds, and black pepper (we made this earlier) and cook them for 1 minute on low heat until they turn into a deeper shade.

Prepare the Yogurt Base
Turn the heat off at this point and slowly add the whisked yogurt (we prepared earlier) to the wok and immediately start stirring and combining the yogurt and the spices. After a minute of stirring, turn the heat back on low. Keep stirring the yogurt continuously on low heat, this is the most important step in the preparation of this dish.
The oil will slowly start to separate and floating on the top and the yogurt will start to bubble gently. This can take about 10 minutes.

NOTE: Yogurt base curry tastes best when made with full-fat yogurt. It is very important to cook yogurt at low heat. If you heat yogurt too quickly, it will separate.
Add the cooked rongi
As soon as the yogurt starts to bubble, add the cooked rongi, and stir to combine. Next, add 1/2 cup of preserved water from boiled rongi. Stir and let this curry simmer (about 5 minutes) as a result the gravy will thicken and the oil will separate.
Combine roasted gobhi/cauliflower
Lastly, add the roasted cauliflower. Stir to combine and let it simmer on low heat for 2-3 minutes.
Note: It is important not to overcook the curry, the cauliflower will lose the crunch and become mushy.

Rongi gobhi ka dum is ready! Garnish with freshly chopped cilantro (coriander) leaves and a pinch of garam masala. Enjoy with hot steamed white rice.

TIP: This curry will thicken as it cools down. While reheating you can add 1/4 cup of warm water and simmer for 2-3 minutes.